Is your swimming pool a haven of relaxation and luxury? The key to sustaining its allure lies in something often neglected: the pool tiles. Tiles not only enhance the pool visually but also protect the water line against stains and mineral deposits. Here are some practical tips for pool tile cleaning that will help you keep your backyard oasis beautiful for decades.
Why you need a regular cleaning routine
Maintaining your pool means more than just skimming leaves and balancing chemicals. Stains and grime can accumulate along the waterline, diminishing the pool’s aesthetic charm. A simple but proactive cleaning routine has transforming power. Below is your complete guide to keeping your pool tiles gleaming for years to come.

Why Does Pool Tile Get Discolored?
Pool tile grime is usually a blend of body oils, sunscreen residue and mineral deposits. If it shows up on your sinks, tubs and showers, you’ll see it on your pool tile.
Test your pool chemistry often. Your local pool supply store has easy-to-use test kits. Too little chlorine makes algae grow. Too much chlorine makes tiles look bleached. However, calcium deposits are the most common problem.
Avoid high alkalinity or pH, as hard water makes calcium problems worse. Keep pool alkalinity between 80-120 parts per million and a pH of 7.4. Hot weather makes some buildup unavoidable, though. Heat quickly evaporates pool water, leaving scale behind.

How Often Should I Clean My Tile?
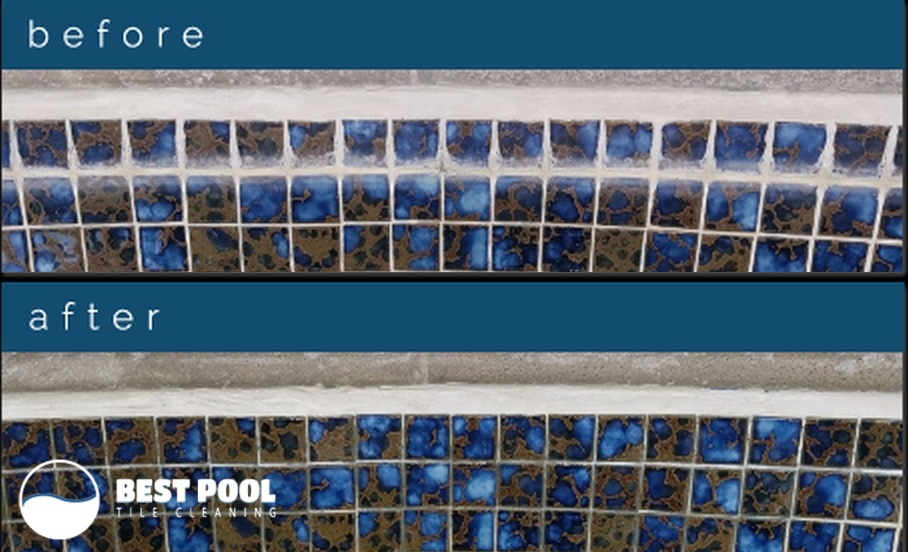
Scale starts showing up on tile as hazy, white, chalky bands along the waterline. Ignoring this can shorten the life of your decorative tiles and require a lot more effort to clean.
To minimize work and cleaning cost, you’ll want to clean your waterline tile as soon as you see any discoloration. This usually means weekly or monthly. At minimum, you’ll need a thorough cleaning at the start and end of the pool season.

If the buildup of minerals, algae or dirt becomes extensive, consider removing it gradually over several days or weeks. This gradual approach prevents overwhelming your pool’s filtering system and helps maintain the water’s chemical balance.
Tools and Equipment
Here are some of the materials and tools you might need. As you’ll see from the explanation below, some of these items are optional. Some may depend on the level of cleaning needed or the type of tile you have:
- Pool pump
- Pool vacuum
- Skimming net
- Protective gloves
- Eye protection
- Soft bristle brush
- Stiff bristle brush
- Toothbrush
- Plastic bucket or garden watering can
- Pumice stone
- Melamine sponge
- Vinegar
- Dishwashing liquid
- Baking soda
- Commercial tile cleaner
How To Begin Cleaning Your Tile

Start by cleaning your pool water of any obvious debris, such as grass, leaves, etc. A pool vacuum and skimmer net are useful for this.
Next, you’ll want to drop the water level below the usual water line with a pool pump. You could skip this step, especially for light cleaning, but it makes tile cleaning easier. On the other hand, if you need extensive cleaning, you may need to drain the pool.
Calcium comes off the same way it builds up – in layers. To remove the outer layer, it’s often best to go over the tile lightly, in a circular motion with a sponge or brush, without cleaner. What kind of brush or sponge? It depends on the tile.
Toothbrushes work great for small areas. However, hard bristles may easily scratch glass tiles. Ask a trusted professional or the tile manufacturer which kind works best for your tile. At least, test your cleaning tool on a small, less visible area of tile before cleaning more. This is especially true of harsher scale removal tools like pumice stone.
This is why pools should have pool tile – not bathroom or kitchen tile. Other tiles soon fade, corrode or crack – they just aren’t made for such regular cleaning, cleaning chemicals and pool water.
After the light cleaning, it’s time to apply cleaning solution and scrub again to remove any remaining buildup.
What Kind of Cleaning Method Is Best?

It’s always best to test the most gentle, environmentally friendly cleaners first. After all, some harsher cleaners require you wait hours or days before you can swim in your pool again without risk.
Be sure to read product labels – not just for the instructions, but the safety precautions you need to take. Remember that product makers are biased about their products. If a product is unsafe, you can be sure they’ll only print the bare minimum required by law.
Not only this, don’t ruin your costly pool investment by using the wrong cleaner for your type of tile.
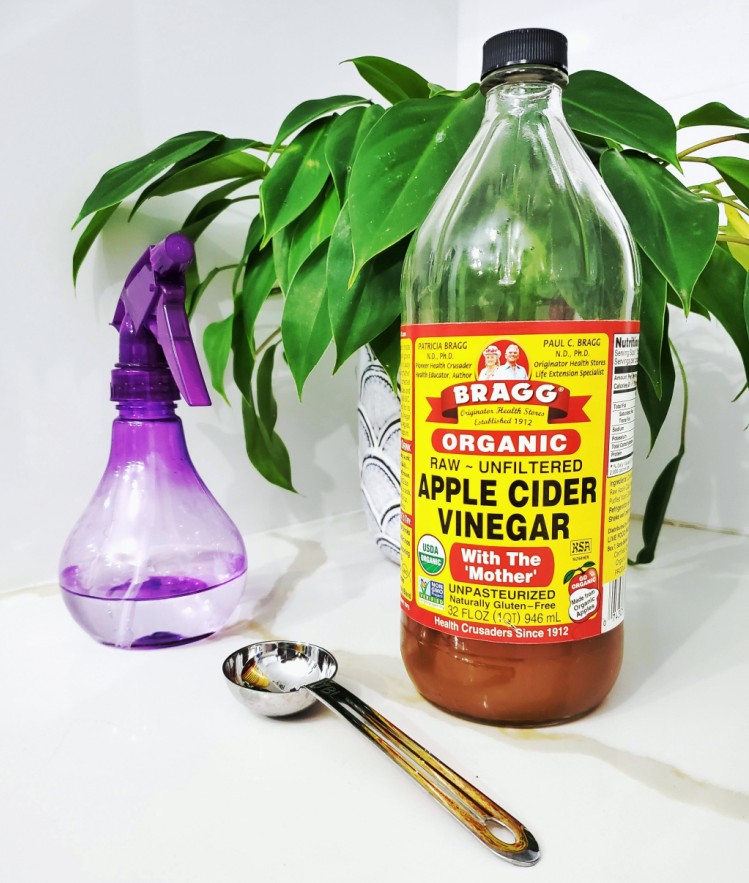
With only light, thin, calcium scale, a soft bristled brush and a water-vinegar solution can work well. Others prefer using dry baking soda and just enough water to make a paste. Another option is 1/4 cup dish soap per gallon of water. Dip your brush into the solution and then scrub the tile. A melamine sponge is handy for tougher stains. Wear eye protection. Even these cleaners are uncomfortable if you get them in your eyes.
For thicker calcium scale, get out your gloves and eye protection. Muriatic or sulfamic acid can be applied full strength, but always test these on your tile in a diluted strength first. It’s also best to check with a professional first before using these harsher cleaners on your tile.
Some have had success by renting a pressure washer from a home improvement store and using this on their tile. Be careful, though. Use a lower pressure setting and avoid breaking loose any cracked or fragile tile.
Make sure you also clean the grout between the tiles. Algae growth in the grout between your swimming pool tiles is a common issue. Scrub the grout with a stiff brush. After a thorough cleaning, you can apply a chlorine tablet to the grout. To further deter regrowth, you can also shock your pool.
How Long Does This Take?
Cleaning regularly and meticulously means less time for each cleaning. Plan on 1 to 3 hours to clean all the tile around your pool waterline.
Summary
A stunning swimming pool means paying attention to your pool tiles. Now you know why tiles get discolored. You’ve also learned a practical, step-by-step way to keep them clean, depending on the level of build-up. Proper water chemistry helps, but regular tile cleaning is vital. Regular cleaning keeps your work easy, ensuring a picture-perfect backyard sanctuary for years to come.

When To Call A Professional
If all of this is more work than you’d like to tackle, or the tile stains are too tough for the methods mentioned above, calling a professional pool tile cleaner is the easiest and best option.
Don’t let replacing pool tile due to neglect or the wrong maintenance cost you tens of thousands of dollars or more.
Sometimes for a few hundred dollars, (depending on the size of the pool and methods needed) you’ll quickly have your pool looking like new again. This often doesn’t require draining your pool. The best cleaning methods also allow you to use your pool right after cleaning, so you’ll be able to enjoy that pool party you planned.
Best Pool Tile Cleaning uses non-toxic, environmentally-friendly, easy-clean-up methods for removing the toughest tile stains fast. We use bead blasting for tougher stains, which is far healthier and more effective than soda or sand blasting.
For routine maintenance, we have even easier and quicker methods. Our friendly staff takes the time to make sure we use the right methods for your needs.
How can we help you?
Call Now:
(760) 610-3392

